
Hi lovelies,
So yeah, turns out we have a Halloween Series here. In this post we’re going to focus on prosthetics; the making and application of. If you’re more interested in the application process skip the first part of this post.
Of course, you can buy a lot of basic wound prosthetics from party stores but some pieces will need to be custom made. You can make prosthetics on any non-porous surface. I’ve used CD cases, plastic bags and packaging from online shopping.
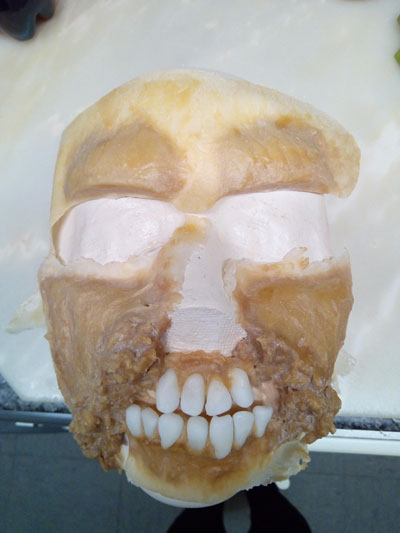
I’ve progressed since then and finally made myself a face cast. You can check out an Ellimacs video on how to make your own face cast (see here). I’ve found that using the cast makes my prosthetics fit my face much better and therefore stay on longer especially around the mouth and cheeks. However, I am making more advanced prosthetics now which require the shaping.
I’m only going to discuss how to make some basic wounds but the skills and methods used can be tranferred to more advanced prosthetics. Unfortunately, all these methods use latex, so if you are allergic this is not the guide for you.
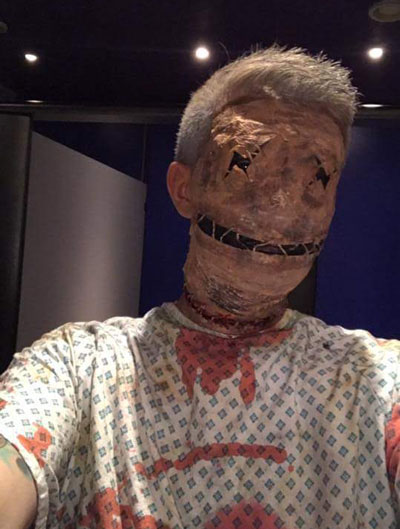
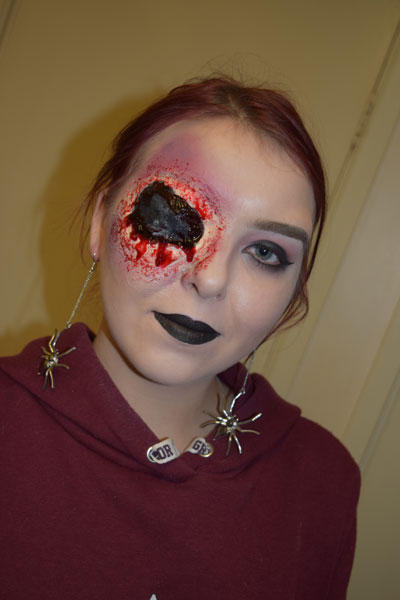
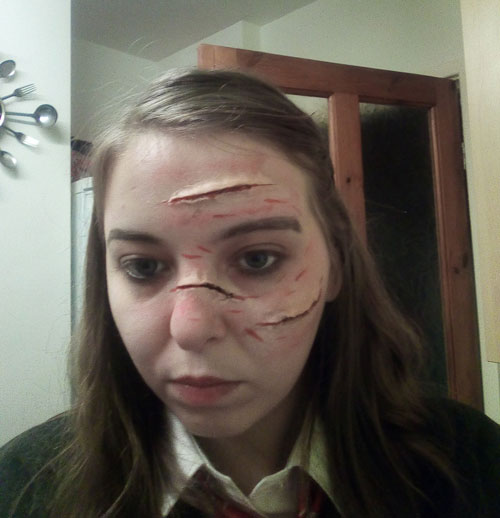
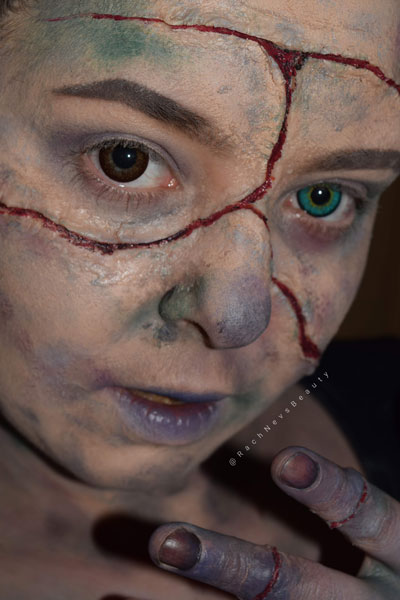
I initially started out trying to make pieces layering up latex and tissue paper. This is a great method for creating patches to cover the eyes and mouth. This can be done directly on the face (mostly around the mouth or neck) or as a separate piece. Making these pieces separately is perfect for sewn up eye patches, we did this last year. Using this same method over the rest of the face produce work like below.
TOP TIP: When working with latex to create prosthetics, keep your fingers and tools coated in liquid latex. It will stop you sticking to your project.
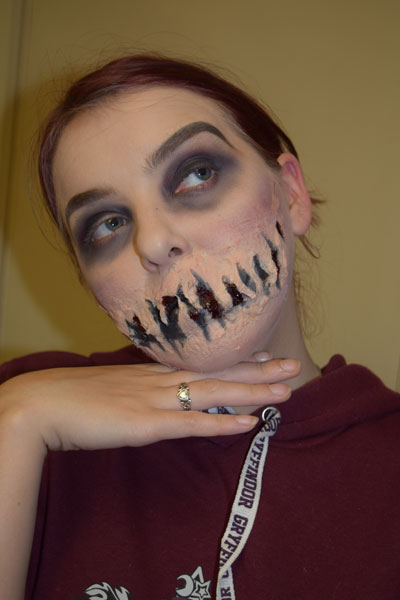
You can also use latex and cotton wool for building wounds and this was where I started out with my crafting. This is a great method for achieving “ragged edges” to your wounds. Smooth down the outer edges of your prosthetic before carving wounds into the mixture. Remember to add a layer of latex around the edges of the cotton wool to achieve invisible edges to the prosthetic.
TOP TIP: Don’t build up the height too much, you want the prosthetic to blend into the nature contours of the face. If it’s too thick, the prosthetic won’t be flexible.
As with the latex and tissue paper, you can use the cotton wool latex mix directly onto your face. If found it does help the pieces stay on longer when they are done this way.
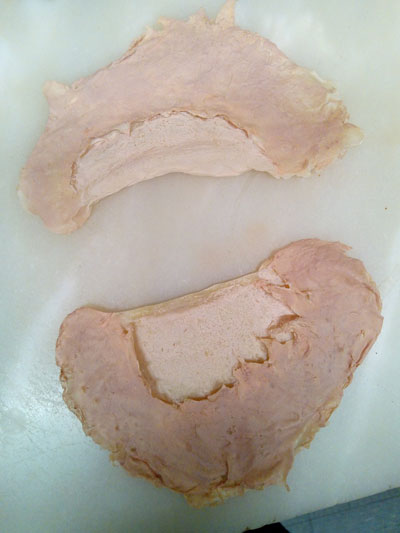
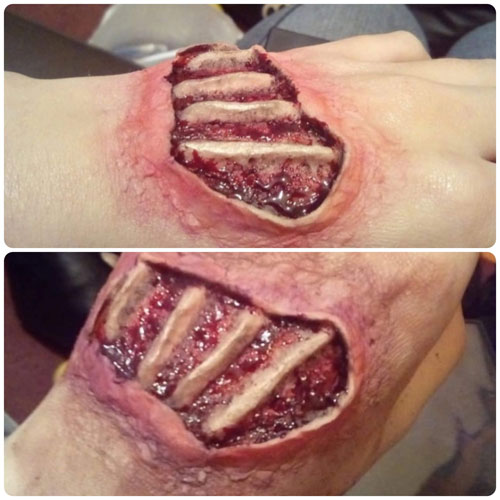
More recently, I’ve been creating prosthetics using a latex flour paste. I’ve found this easier to work with than the cotton wool mix as it sticks to you less. It’s also easier to carve your wounds into this one although it does dry slightly heavier than the cotton mix. This is perfect if you are wanting to imbed items into your prosthetic.
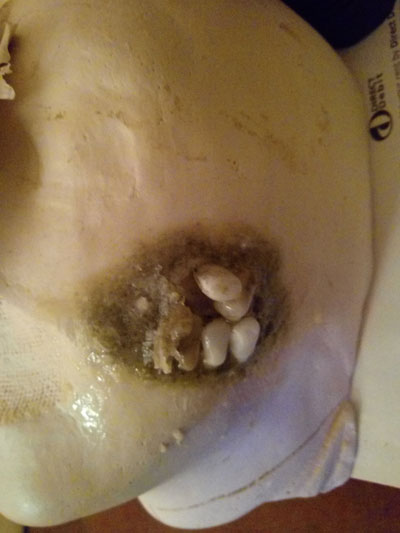
TOP TIP: You can make your mixture as wet or as thick as you need depending on your project but you need a thicker mixture when carving out wounds.
You can make very lightweight horns and other wounds by making a mould out of clay and covering it with many layers of liquid latex. When the latex is dry, you remove the clay to be left with a latex sheath. Pad out raised pieces using cotton wool to keep them light but with some structure.

TOP TIP: With this method use a thicker liquid latex (I use Mehron). It will work better at covering your mould.
No matter what type of prosthetics you make using latex when removing them from your base you need to add powder. And lots of it. This will stop the latex sticking to itself and ruining the beautiful edges you have lovingly crafted.
For shop bought and home made prosthetics, the application process is the same. Naturally achieving invisible edges is much easier with shop bought products but if you make them right, home made prosthetics can have equally invisible edges.
To start with you want to moisturise your skin. The skin adhesives are not exactly kind to the skin so be sure to take that extra care. Also, if you’re working near any hair be sure to add vaseline over the top of it. Hair and latex do not mix and this will stop a lot of pain.
Now you can add your skin adhesive. What you use is your own preference, you can try spirit gum, prose aid or liquid latex. I’ve never used prose aid so I can’t say how that one works. Spirit gum can be a little tricky to work with and isn’t my prefered method. I tend to use liquid latex just because I have it on hand and it sticks well.
TOP TIP: When using spirit gum, pop a layer onto the skin and also the prosthetic. TAP the spirit gum until you see gummy strands. It won’t stick if you don’t tap it.
When applying the prosthetic I like to glue down the middle first meaning I can just roll the edges into place. This is another reson why I don’t like to use spirit gum. With home made prosthetics you need to be extra careful when laying down your edges. Messy edges is usually what gives prosthetics away.
TOP TIP: For shop bought prosthetics you can remove and blend out the edges using acetone. This will melt the edge onto your skin leaving you with the perfect blend.
You can also create wounds using other SFX items such as extra flesh and scar wax. Both methods I find very tricky to work with so I don’t bother playing with these for parties. Mehron extra flesh can be good for wounds but it doesnt dry. It’s also extremely sticky which is what makes it so hard to work with.
TOP TIP: When working with extra flesh have some makeup remover or Mehron skin prep next to you. This will help stop the extra flesh from sticking to your fingers.
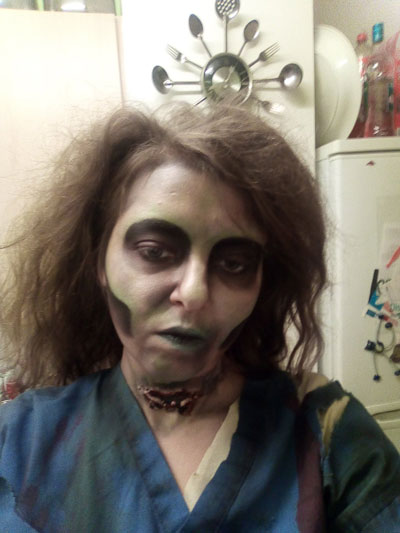
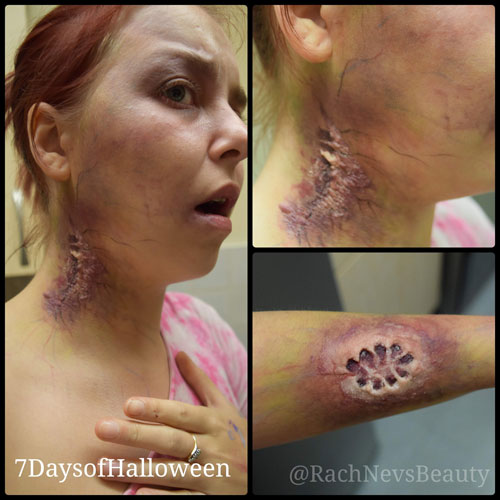
You can use scar wax in the same way or for adding contours to the face (nose pieces, cheeks). I’ve tried it for wounds but I had so much trouble trying to smooth out the edges. I also had trouble getting it to stay on as it’s not very flexible. Very good for zombie bites though.
Sorry again for the ultra long post but I hope you’ve found this little(ish) guide helpful. Feel free to add any other information you have learned to the comments. Also drop a like or even subscribe if you loved it. Thanks for reading.
Happy Hallowe’en
Rach x
Donations…Everything Helps!!!!
Want to help fund us? Send a donation and get your name added to our social media pages too!!!! I’m a poor Odeon worker and JSC palettes are expensive. Everything helps.
£1.00

1 thought on “Special Effects Makeup-Prothestics Time”