
Hi lovelies,
As you know, my wig collection has been growing recently and therefore they require some care and attention. I still don’t know why I’ve written this post as I have zero experience with hair and virtually no equipment. I haven’t been able to do anything fancy and I highly recommend watching plenty of Youtube videos for more information on styling your wigs. I’ve found that the most informative and learned videos are created by the black community of Youtube which means y’all need to run from this post.
Equipment…..
I’ll start with THE most essential items-a detangling or flat paddled brush, a wide toothed comb and some detangler spray. I’ve been using the Mane ‘N Tail detangling spray (see here). Having these items means you can at least brush your wigs without any difficulty especially at the back. The hair at the nape of the neck is most likely to tangle so look after that spot.
A wig head is another great place to start. You can purchase either a polystyrene head or a cork canvas one depending on your needs. I have both but use the polystyrene ones (see here*) for storage and my cork one (see here*) for styling. The cork ones are bigger and more realistically shaped while the seams help you with sectioning/parting the wig.
Alligator clips are another essential to me as they are versatile. Perfect for sectioning and holding hair out of the way. They are also useful when styling for holding hair in particular places while letting the style dry/set into place. Be sure to get plenty of pins too for securing the clips during curling.
Back Combing brush-another essential for getting volume into your wigs.

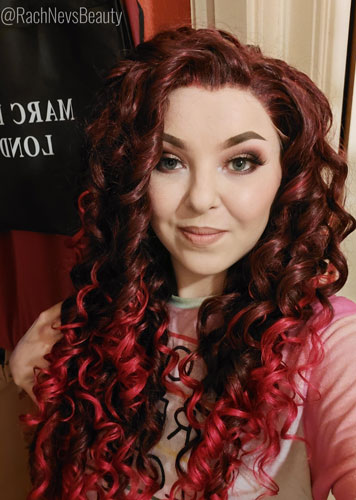
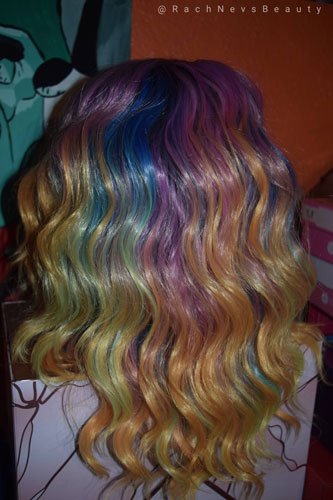
Styling my red curls……
So this one was my very first lace front (see here) and she desperately needed a wash before restyling (see below). I’ve not fully brushed this one out because I love the curls and don’t want it to frizz so I’ve been finger combing it….and yeah she’s a mess. So after a quick wash it was time to get started. If you’re not washing your wig be sure to have a spray bottle of water to dampen each section of hair. This makes the hair easier to handle and secures the curl without the use of a steamer (cos I don’t have one).

First thing to do was to section the curls at the front and figure out my parting. You can set your parting in place or lay it flat using a hairdryer on a low heat if you need to but I wasn’t bothered for this one. I started at the front as I wanted to make sure the front was fully styled for pictures in case I ran out of clips. Once I figured out the direction of the curls, I applied some Schwarzkof Got2Be Twisted Curling Mousse (see here) to the ringlet before finger curling. I literally just rolled the ringlet back up on itself right up to the root and secured with an alligator clip and pin.

Naturally, I ran out of clips halfway round the cap but I found some rollers to use. I found this a little more awkward to do and didn’t like using the foam rollers. I think these were too small to be honest which is why they didn’t really work for me at the back. I also found the synthetic hair stuck to the foam so maybe a plastic/mesh roller may work better. I’ll keep you updated on that one. Once it was all pinned up, I left it to air dry overnight. I sprayed the curls with hairspray before unpinning them. The front and top sections, the finger curled part, ended up looking great with neat, tight ringlets.

Styling a big fringe….
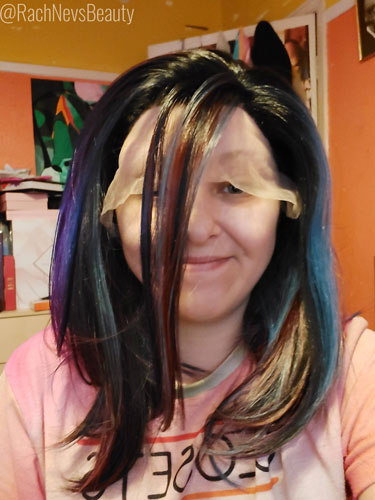
Ok so this was a little trickier than the curls and is much easier when you have a back combing brush. When putting the wig on the wig head, use a length of ribbon to hold the lace flat while you’re styling. This stops the lace front lifting up when wearing your styled wig. You can use this ribbon to hold the hairline flat before adding in any volume for the same reason. If you’re styling a wig with full volume (drag style) than you’ll want to use rollers to set a base volume curl and you’ll have already sectioned your fringe. When styling from straight, set your parting and section a triangle from the front. Pop in some volumising mousse and back comb and smooth the hair. This creates the volume for that huge curl. For the straight one, I just folded that section back over, supported it with a roller and hairsprayed it solid with Got2Be Freeze Spray.

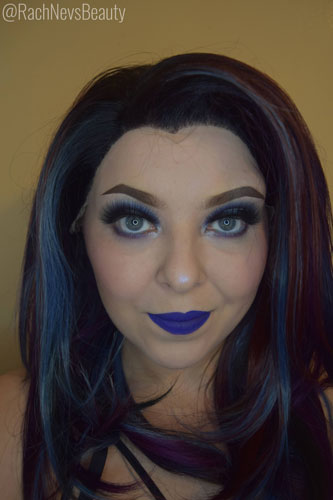
I used the same technique for the front of the sunset one but after supporting the height with a roller; I used alligator clips and pins to force the fringe to curve back towards the hairline. I finger curled the ends and secured with clips then hairspray.


Washing your wig…
So it’s hugely important to keep your wigs clean especially the cap and lace for obvious reasons. Aside from that, washing the hair/spritzing with a conditioner solution can pop some bounce back into those curls and waves. I know washing a wig may seem a scary proposition at first but it’s actually pretty easy. For a quick clean, you can use a toothbrush and 70% alcohol to clean makeup and glue off the lace. Be gentle.
Fill a tub, bucket, sink with cool water and add your shampoo/soap. Here’s where you gotta do your own research into what works best….I’ve seen baby shampoo, dish soap, washing powder etc recommended. You need to know your wig type to know what’s best for you. Lay the wig into the water keeping the cap open like the image below. This stops the hair from tangling into the combs and makes cleaning it easier.
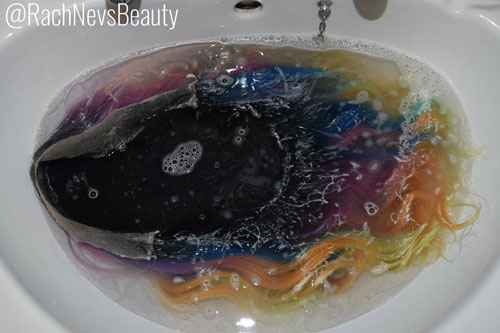
I let my wig soak for a few minutes before applying additional shampoo to the underside of the cap being careful when rubbing. Cleaning the parting and hairline from the inside keeps them both neat and tidy as well as stops tangling. Holding onto the front of the cap, I dip and gently swirl the ends to get them clean. When swirling in the water follow the direction of the hair and don’t rub it. Rinse in cool water the same way or run under the tap. Again, following the direction of the hair.
Carefully squeeze the excess water from the hair and lay on a towel to dry some more. Don’t rub the hair when towel drying and then give it a brush. From here, you can put rollers in or let it dry naturally. Hanging it upside down to dry will give it some natural looking volume.

So yeah, that’s it so far. I hope I managed to explain my processes without confusing the sh*t outta you and given you some basics if you’re struggling to know what’s essential. At first I was absolutely terrified of attempting to do anything with my wigs but it’s not as scary as it may appear even with no equipment. Obviously I’ve not attempted anything hard or spectucular looking but we all gotta start somewhere and small is better than nothing.
Thanks for reading. Has this helped you style your wig…send us your images and looks for a social media feature. Don’t forget to hit that like, follow or leave us a comment. Maybe even join our email list if you loved it.
Rach xx
*Affliated Link where commission is earned
Donations…Everything Helps!!!
Want to help fund us? Send a donation and get your name added to our social media pages!!!! I’m a poor Odeon worker and certain brands are expensive. Everything helps.
£1.00

1 thought on “Styling A Wig-A Total Beginners Guide”